3.2. Markdown#
In this section, you will create a new Markdown file and add some content to it. Then you will configure Jupyter Book to include this file in the final output. Afterwards, you will add more content while learning different elements of the Markdown syntax.
3.2.1. Creating a New Markdown File#
Theoretically, you can create a file containing content anywhere in the repository. We recommend that you create folders to represent the structure of your content and place the content files within these folders. For this example, we will create a new file in a folder called trust.
Caution
Git does not track empty folders. If you want to create a folder in your repository, you need to create at least one file in it. This can be an empty file, but it must exist.
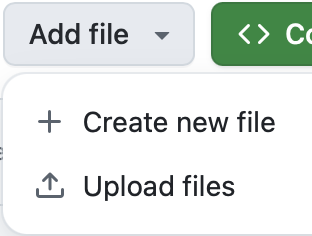
Fig. 3.8 “Add file” button in the “Code” tab#
To create a new file, click the button “Add file” and then on “Create new file” (see Fig. 3.8). This opens an editor where you can enter a filename.
The filename can contain forward slashes (/) to denote a folder structure. For the workshop, use the filename trust/what_is_trust.md. This means that you will create a new folder called trust and inside it a file called what_is_trust.md (see Fig. 3.9).

Fig. 3.9 “Filename” set to trust/what_is_trust.md#
Now add a title to the page. In Markdown, titles are created by using a hash (#) followed by a space and the title text. Add the following line to the file:
# What is Trust?
The result should look like this in the editor:

Fig. 3.10 Minimal Markdown file with a title#
Now commit your changes, add a commit message and try to locate the new file in the “Code” tab of your repository.
Caution
You need to add a title to the markdown file by using a heading (e.g. # What is Trust?) in your Markdown file. Otherwise, Jupyter Book does not correctly add the files content to the result and the table of contents.
The first #-heading in the file will be used as the title of the page and in the table of contents on the resulting website.
3.2.2. Configuring Jupyter Book to Include the Markdown File#
If you look at the resulting website, you will see that the new file is not included in the navigation. To tell Jupyter Book to include the file, you need to edit the _toc.yml file in the root of your repository. This file defines the table of contents for your book.
Currently, the _toc.yml file looks like this:
# Table of contents
# Learn more at https://jupyterbook.org/customize/toc.html

format: jb-book
root: index.md
options:
  numbered: 3
chapters:
  - file: präambel/toc.md
    sections:
      - file: präambel/lernziele.md
      - file: präambel/technische_voraussetzungen.md
      - file: präambel/vorkenntnisse.md
  - file: epilog/toc.md
    sections:
      - file: epilog/literaturverzeichnis.md
      - file: epilog/autor_innen.md
      - file: epilog/impressum.md
Add a new chapter entry for your new file. Commit the change, wait for the action to finish, and then check the resulting website.
Caution
YAML files are sensitive to indentation. Make sure you use multiples of two spaces for indentation and don’t use tabs.
When editing the file follow the structure of the existing entries.
Exercise: Chapters and Sections
Create a chapter with at least one section. The first section in the chapter should be the file trust/what_is_trust.md.
Solution
Create a new file
introduction.mdin the foldertrustwith at least a heading as content.Add a new entry for
introduction.mdin the_toc.ymlfile.Move the entry for
what_is_trust.mdto be a section oftrust/introduction.md.
3.2.4. Result#
You now have a Markdown file with some content in it and it is included in your Jupyter Book. You can compare your result with the sample solution.
In the next section, you will learn how to use Jupyter Notebooks to author content.