3.1. Setup and Configuration of Jupyter Book#
In this section you will create a new repository in GitHub based on the OER-Workshop-Template and configure it. The result is a Website hosted on GitHub Pages that reflects the state of the template but belonging to your GitHub account. Then you will change _config.yml and CITATION.cff to personalize the repository and make it your own.
In the following sections you will add content to your repository and customize it further.
3.1.1. Creating a New Repository from the Template#
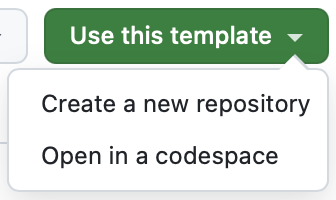
Fig. 3.1 “Use this template” button#
Open the OER-Workshop-Template on GitHub and click the “Use this template” button (Fig. 3.1) in the upper right corner. Select “Create a new repository”.
On the next page, name your OER by filling out the field “Repository name”. If you don’t have anything in mind, use my-oer.
The repository need to be public, which is the default setting.
3.1.2. Setting Up GitHub Pages#
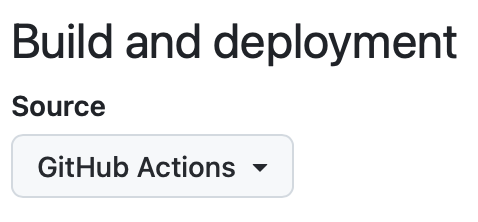
Fig. 3.2 Use GitHub Actions as
the source for GitHub Pages#
After creating the repository, you will be redirected to the new repository. In the upper right corner, click on “Settings”. On the left side, click on “Pages”. Under “Source” select “GitHub Actions” (see Fig. 3.2).
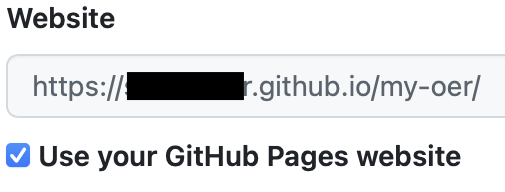
Fig. 3.3 Automatically fill the
“Website” field with the URL to
your GitHub Pages#
Return to the main page of your repository via the “Code” tab in the top left. In the right sidebar you can edit the “About” section by clicking on the gear icon. Select the checkbox “Use your GitHub Pages website” (see Fig. 3.3). This will prefill the “Website” field with the URL to your GitHub Pages.
3.1.3. Allowing Write Access for Pair-Programming#
If you want to work in pairs, you can allow your partner to edit your repository. To do this, go to the “Settings” tab of your repository and go to “Collaborators”. There, click on “Add people”, search for your partner’s GitHub username, and add them as a collaborator. They will receive an email inviting them to your repository.
3.1.4. Edit README.md#

Fig. 3.4 README.md file in the
“Code” tab#
In the “Code” tab, click on the README.md file to open it (see Fig. 3.4). In the file view, you can see the repository’s folder structure on the left side while the currently selected file fills the rest of the page.
The file view has a toolbar at the top in which you can change the display mode on the left side and download or edit the file on the right side (see Fig. 3.5).

Fig. 3.5 Toolbar in the file view#
Click on the pencil icon to edit the file. Change the contents to the following:
# My OER
This is my first OER using the QUADRIGA OER Workshop Template.

Fig. 3.6 Cancel or commit changes#
You can alter this file as you wish. When you are done, commit the changes by clicking on “Commit changes” in the top right corner (see Fig. 3.6).
This opens a dialog where you can enter a commit message (see Fig. 3.7). A commit message is a short description of the changes you made. It is good practice to write a meaningful commit message that describes what you changed and why. For example, “Update the README to make it my own”. You can also add a longer description.
In this workshop, we will always use the “Commit directly to the main branch” option, which is the default setting. Branches allow for parallel development in a repository, but we will not use them in this workshop. Click on “Commit changes” to save your changes.
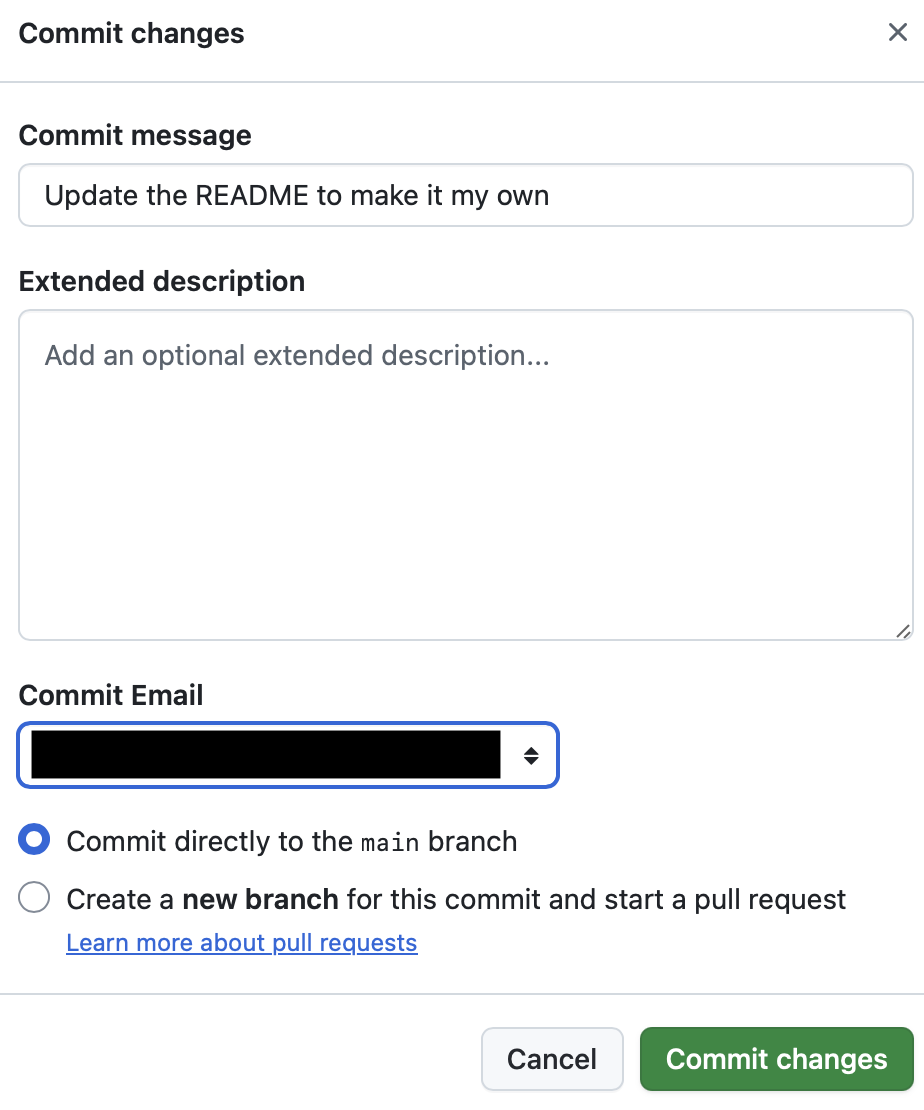
Fig. 3.7 Commit message dialog#
3.1.5. GitHub Action#
The commit to main automatically triggers the GitHub Action defined in .github/workflows/deploy-book-python-only.yml which is predefined in the template. This Action builds the Jupyter Book and deploys it to GitHub Pages. You can see the progress and possible errors of the Action by clicking on the “Actions” tab in the top menu of your repository.
In this workshop, we will not go into detail about GitHub Actions, but you can find more information in the GitHub Actions documentation.
3.1.6. Change the metadata#
Now you can change the metadata of your repository to make it your own. Open the _config.yml file in the “Code” tab and edit it to fit your OER.
At least look at the keys title, author, description, and repository.url.
You can also change the logo key to point to an image of your choice.
3.1.7. The Result#
Now you can click on the URL in the “About” section of the “Code” tab. This will take you to your newly created GitHub Pages site.